Best Low-Code Tools for Building Web Apps in Julia
Discover the best low-code tools for building web apps around your Julia data analysis code, AI models and simulations.
When developing analytical applications, AI models, or simulations, writing high-quality and performant code is arguably the most important piece. After all, we want to make sure we can trust our results or predictions, and uncover meaningful insights. But what happens when it's time to share these insights within our organization or with clients? The real challenge is presenting complex data in a way that's accessible to other stakeholders, including non-technical business users or clients.
Web Apps: a powerful tool for increasing engagement in R&D and Data Science
The typical way to share our work as data scientists or R&D engineers is by sharing our code, a report, or a notebook. Each approach, however, comes with its own set of challenges. Sharing the code requires the recipient to have enough technical expertise to run it and set up the environment with the required libraries, which is often not the case with business users. Reports, while clear, are static and don't allow for interactive exploration, which is key for collaborative decision making. Notebooks improve on this with some level of interactivity, but their format is not friendly for business users and is limited in terms of customization and extensibility. Notebooks might also expose our code, which can be sensitive if we want to share our work with third parties.
That's where web apps come in and bridge these gaps. Data-centric web applications with dynamic controls allow non-technical stakeholders to explore data or run AI models and simulations. Web apps transform data exploration into interactive, highly-customized and user-friendly experiences, while protecting your source code.
Despite their advantages, the thought of developing data-centric web apps can be daunting for users lacking web development skills. In fact, a web app would typically require at least a basic understanding of HTML, JavaScript, and CSS, not to mention the challenge of integrating your data processing logic with the user interface (UI). But worry not- there are solid low-code solutions out there that make web app development finally accessible to data science and R&D teams. Let's take a look.
Low-code tools empower R&D and Data Science teams to create web apps
Low-code app frameworks and tools like Genie for Julia, Dash for Python, and Shiny for R empower professionals in data science and R&D to create web applications using their preferred programming languages, without having to learn web technologies such as HTML, CSS, or JavaScript. By abstracting away the complex aspects of web development, these tools enable users to focus on leveraging their expertise in their respective domains while bringing their work to life with interactive web apps. As a result, data science and R&D teams can share their insights, projects, and research more easily and often, speeding up innovation and driving smarter decision-making in their organizations.
Best low-code data app development tools for Julia
In the Julia ecosystem, Genie is the most popular open source framework for web development. It is a complete toolbox for building data-centric applications in Julia, and can be used to quickly develop demo applications as well as to scale them to production-grade applications.
When it comes to building web apps in low-code Julia, Genie offers two solutions:
- Genie Stipple: an open source, low-code app framework for creating data-centric web apps and GUIs.
- Genie Builder: a paid VS Code extension built on top of Stipple, featuring a drag & drop UI builder and AI assistant to speed up app development.
In addition to Genie, Julia users can also consider Dash.jl, a Julia interface to Python's low-code app framework.
In this article, we'll put all these tools to test by building the same web application - a tool for stock analysis. You can check the live app and the code on GitHub. We have already included the Julia analytics code in the provided stock-analysis.jl which you can view here.
Genie Builder: the fastest way to build data apps in Julia
Genie Builder is a VS Code extension with a drag-and-drop UI builder and embedded AI assistant. With Genie Builder, users can design the UI without writing any code, as Genie Builder generates the required HTML, CSS and JS for you. The backend of the app is written in low-code Julia leveraging the open source Genie Stipple.
A Genie app is typically formed by two files: app.jl for the backend logic, and app.jl.html for the UI. This is the initial structure of our project:
GenieApp/
├── Manifest.toml
├── Project.toml
├── README.md
├── app.jl
├── app.jl.html
└── stock-analysis.jl
We'll only manually edit the code in app.jl since app.jl.html is handled by the UI editor. When developing a data app with Genie Builder, the workflow is as follows:
- Import your Julia code.
- Design the UI with the drag-and-drop editor.
- Implement the reactive code to handle interactivity.
- Bind the UI components to the reactive code.
We start from step 2 by building the UI for the stock analysis dashboard as in this clip:
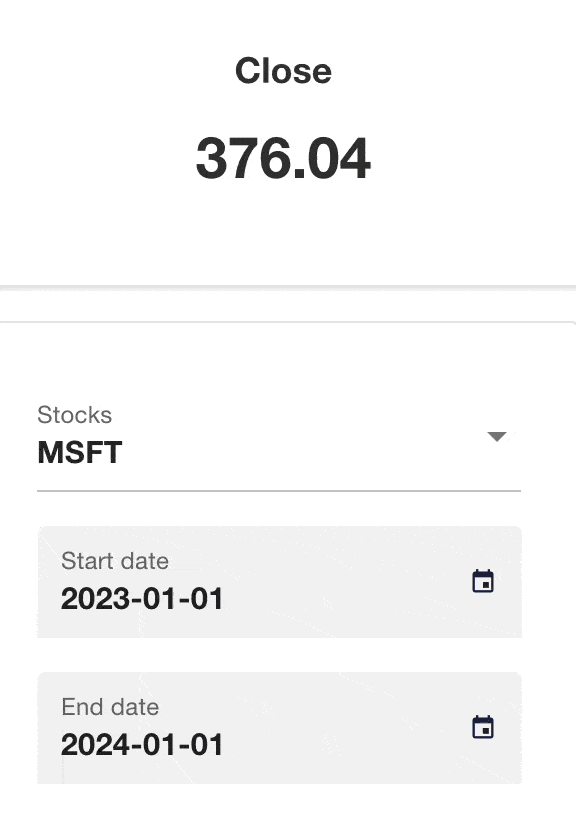
This is a good start! In just 1 minute we have created a UI that includes:
- Four big number components to display stock metrics like the average close price, or return %.
- A stock selector dropdown menu, and two date pickers to set the time period for the retrieved stock data.
- A chart that will display the close price over time.
Moreover, if we wanted to manually edit the UI code, we could do so by changing the HTML in the app.jl.htmlfile. And if we wanted to style our app further, we could use the Genie Builder style menu or import a stylesheet, for example to maintain consistency with our company's visual identity.
With the UI implemented, we add the reactive code to the app.jl file, which has this initial structure:
module App
using GenieFramework, YFinance
@genietools
@app begin
    # Reactive code goes here
end
@page("/", "app.jl.html")
end
First, we need reactive variables to hold the value of the numbers, select menu, date pickers and plot. Reactive variables are automatically synchronised between the Julia code in the backend and the web UI in the browser; whenever their value changes on one end, the updated value is transferred to the other end.
For the select menu, this is how we'd declare the necessary variables:
module App
using GenieFramework, YFinance
@genietools
@app begin
    @in selected_stock = "AAPL"
    @out stocks = [ "AAPL", "TSLA", "MSFT", "A", "AAL"]
end
@page("/", "app.jl.html")
end

- We set up the
selected_stockvariable as an input with the@inmacro. This variable will contain the value of the selected stock in the dropdown menu. - We output the
stocksvector with the@outmacro, so that its values can be used to populate the stock select menu.
With the reactive variables defined, now we're ready to add interactivity to the app. When a new stock is selected in the menu, we want to gather new data and update the metrics and plot. We'll do this with a reactive handler implemented with the @onchange macro, which run the data update code snippet when selected_stock changes:
@app begin
    # . . .
    @onchange selected_stock begin
        prices = get_prices(selected_stock, startdt=start_date, enddt=end_date) |> DataFrame |> add_ma20!
        end_price, period_diff, percent_return, avg_price = metrics(prices)
    end
end
As we've shown, the reactive code is fairly simple, with just the @in, @out and @onchange macros you can implement all sorts of interactivity. Open the code fold below to see the full code in app.jl:
The final step is to bind each reactive variable to the UI components, and configure the plot. This is done in the visual editor as in this video:
And this is it! We have built an app with Genie Builder in just a few steps, in about 30 minutes.
Genie Builder users can also take advantage of its embedded AI assistant to further speed up their app development. The AI assistant can be used to build or edit the app UI, and for personalized help on how to write the backend code. Perhaps the most productive workflow is to ask the AI assistant to create a starter template for the UI, which can be then refined quickly with the visual editor. Assuming we start with the reactive code already written in the app.jl file, this is how we'd build the UI of our app with the AI assistant:
As you can see, building the UI with this AI-assisted workflow takes only a few minutes. It enables users to simply bring their Julia code and have a personalized template UI generated based on that code, instead of having to build the UI from scratch on a blank canvas.
Genie Stipple: the most concise, Julia-native low-code framework
Writing a web app in Genie Stipple entails the same steps as using Genie Builder, except that the UI is also written in low-code Julia. Genie Stipple provides a set of high-level functions that allow you to define the UI in a more programmatic way. Under the hood, these functions generate the HTML for the corresponding component, while providing easier configuration and sensible defaults.
To implement the UI from the previous section with Stipple, we'll add the following code to app.jl:
ui() = [
       h1("Stock Analysis")
       row(class="st-module",
           [bignumber("Close", :end_price),
            bignumber("Average", :avg_price),
            bignumber("Difference", :period_diff),
            bignumber("Return(%)", :percent_return)
           ])
       row([
            cell(class="col-3 st-module", [
                    select(:selected_stock, options=:stocks),
                    datefield("Start date", :start_date),
                    datefield("End date", :end_date),
                ]),
            cell(plot(:traces))
           ])
      ]
@page("/", ui)
This code uses the StippleUI API, where each Julia call generates a component's code. Moreover, the plot is now declared in the backend with PlotlyJS and added to the UI with the plot(:traces) call. Open the fold below to see the full code in app.jl.
Although it has a steeper learning curve than Genie Builder's visual editor, Genie Stipple is user-friendly. Being a native Julia framework, its syntax is easy to understand, concise and follows Julia's best practices, making it easy to learn for Julia users.
Dash.jl: a familiar choice for Julia users coming from Python
Dash.jl is a Julia interface to the popular framework for building web apps in Python. It's a great choice for Julia users coming from Python who already have familiarity with Dash.
Compared to the Genie ecosystem, Dash is similar to Genie Stipple as it provides a way to create reactive user interfaces in low-code Julia. However, Dash.jl lacks the feature depth of the Genie Framework, making it harder to evolve a Dash app into a complex and scalable application. In addition, while documentation is extensive for the Python version of Dash, the Julia version lacks guides and examples.
Let's now build our web application with Dash.jl. Focusing on reactive interfaces, Dash relies on the following concepts:
- Low-code API for UI elements.
InputandOutputobjects to connect UI elements to reactive code.- Callbacks to handle interactivity.
These are similar to those in Genie Stipple, where @in and @out are used for reactive variables and @onchange for reactive handlers. To compare both syntaxes, let's look at the minimal example from the Dash.jl GitHub repo:
using Dash

app = dash(external_stylesheets = ["https://codepen.io/chriddyp/pen/bWLwgP.css"])
app.layout = html_div() do
    dcc_input(id = "my-id",
    value = "initial value",
    type = "text"),
    html_div(id = "my-div")
end
callback!(app,
          Output("my-div", "children"),
          Input("my-id", "value")) do input_value
            "You've entered $(input_value)"
          end
using GenieFramework
@genietools

@app begin
    @in msg = "initial value"
end
ui() = [textfield(:msg),
        cell("You've entered {{msg}}")]
@page("/", ui)
Genie Stipple's syntax is simpler and cleaner than Dash's, both for the reactive code an UI definition. Moreover, as your app grows larger, this simpler syntax makes its code much easier to read and maintain.
For a full comparison, we've implemented the code from the previous section using Dash.jl. As you'll notice, the app written with Genie Stipple has 34% less lines of code than the one written with Dash.jl. Open the code fold below to see it in full:

Dash (left) vs. Genie Stipple (right) implementation of the stock analysis app.
Conclusions: comparing the tools
In this article, we've shown how to build a simple app for stock analysis using the Genie Builder VS Code extension and two open source low-code app frameworks- Genie Stipple and Dash. We've seen how Genie Builder speeds up app development with its drag & drop UI builder and AI assistant, allowing us to build the app in 30 minutes. Building the same app with Genie Stipple and Dash, assuming no prior knowledge of the tools, would take a minimum of 3 hours. We've also compared the syntax of Genie Stipple and Dash, showing how Genie Stipple has a more concise, Julia-native syntax, leading to writing 34% less lines of code than Dash and more maintainable code.
See the table below for a summary:
| Tools | Genie Builder | Genie Stipple | Dash.jl |
|---|---|---|---|
| Backend | Low-code Julia | Low-code Julia | Low-code Julia |
| UI | Drag & drop editor + AI assistant | Low-code Julia | Low-code Julia |
| Benefits | 6-10x faster | Native Julia, 30-40% less LoC than Dash | Familiar for users coming from Python/Dash |
Deploying and sharing your Julia web apps
Now that we built our app, it's time to deploy and share it. Figuring out deployment can be challenging for users with no DevOps background. In fact, the most common way involves packaging the app into a Docker image and deploying that container to a cloud service.
Let's see the steps:
- Writing the Dockerfile for building the image. You can check out a Genie guide on the topic.
- Setting up Docker in a dedicated machine in AWS EC2 or Google Kubernetes Engine and deploying the image there. There are also simpler services like Fly.io or Google Cloud Run but these stop the apps when they're inactive, which does not work well with Julia's long startup times.
A faster alternative, tailored for Julia web applications, is to deploy on JuliaHub where users can publish their apps in one-click, and then share them with the world or password-protect them to limit access.